Pages

Wednesday, December 7, 2011

Corn Bread

This post reminds me of summer because it is the result of one of our summer trips to the Amish village in Pennsylvania. It was good and relaxing, a nice buggy ride and steam engine ride through the scenic village. We missed the homemade ice-cream though, because we went there on a Sunday and the Amish don't work on Sundays for Sabbath. I envy those Amish guys, how do they manage to live their life without TV, electricity, hats off to them. We have all gadgets and amenities but can't enjoy the beauty of nature, also suffer health wise having all the impure stuff in our bodies in the cities. I know it will not be easy for us as we are spoiled with all the modern luxuries but fresh air, fresh homemade goodies from fresh farm grown bounty, no wonder the Amish people seemed so simple and fresh. I picked up an Amish bread book from the visitors store and tried the corn bread, it is amazing.

Well it is winter now and we are left with just great memories from summer. However this corn bread will definitely warm homes, hearts and taste buds. The book called this corn bread as corn pone but it definitely tasted like those little corn breads you get in restaurants and grocery stores, much better actually. So to not confuse myself I am going to call it corn bread.


Source: "Breads" Cookbooks from Amish kitchens

Ingredients:
  • 1 cup sugar
  • 1/2 cup butter or shortening
  • 2 eggs
  • 1-1/2 cups cornmeal
  • 1-1/2 cups all purpose flour
  • 3 tsp baking powder
  • 1/2 tsp salt
  • 1-1/2 cups milk
Directions:
  • Preheat oven at 450 degrees F.
  • Cream sugar and shortening. Add eggs and beat well.
  • Combine cornmeal, flour, baking powder and salt. Mix it with the sugar and shortening cream alternately with milk, till you have batter with no lumps.
  • Pour into greased and floured 9" x 13" cake pan. Bake at 450 degree F for 30-35 minutes.

Fresh corn bread and broccoli soup, YUM
  • Enjoy!


Thursday, October 6, 2011

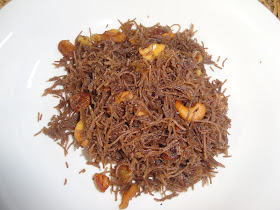
Ragi/ Finger Millet Vermicelli Dessert

The other day on my regular visit to the Indian grocery store I found this pack of Ragi vermicelli. Hmm.. interesting I thought to myself. It is a known fact that Ragi is loaded with nutrients. So I thought I should try Ragi in this new way. I like to experiment with products that attract my attention for being healthy or maybe unique or just different.

Some people have an aversion towards Ragi and I think that is because of it's unappetizing color. Taste wise like any flour it will take the flavors very well and give out the flavors that you add to it. So don't judge Ragi by it's look, taste it and apart from finding it tasty you will do your body some good with all the health benefits it offers. Ragi is extensively used in Karnataka and there is a dish called Ragi mudde, which is, cooked ragi flour balls served with sambhar or chicken curry. As a child when I used to visit my aunt's place in Bangalore I could not stand my cousin brother devouring ragi muddes with chicken curry so lovingly. I hated it. I do not hate it now but somehow that dish will never be on my favorites list. I do not mind having Ragi in the form of dosas, rotis, kheer and my new found vermicelli.

Ragi is high in protein and fiber and very low in fat, making it an ideal diet for people (like me) wanting to lose some weight. This ragi vermicelli can be made as a breakfast item by making it savory like upma or as a dessert in the form of kheer or dry, which I made for the occasion of Dussehra.


Ingredients:
  • 1 pack Ragi vermicelli (180 g)
  • 1/2 cup sugar (you can add more if you like it more sweet)
  • 3 tbsp cashew nuts roughly chopped
  • 3 tbsp walnuts/ almonds/ pistachios roughly chopped
  • 2 tbsp golden raisins
  • a pinch of saffron
  • 1 tsp cardamom powder
  • 1-1/2 tbsp ghee
Directions:
  • Prepare vermicelli as per package directions, it calls for soaking the vermicelli for 3 minutes in water. Then steam the vermicelli after draining water for 5 minutes. The vermicelli is then ready to be used the way you want.
  • Heat ghee in a deep pan and add saffron, cashew nuts, other nuts and raisins. Let the nuts get lightly brown.
  • Add sugar and prepared vermicelli and mix well.
  • Add cardamom powder and mix well.
  • You can garnish with slivered almonds and serve warm.
  • Enjoy! Happy Dussehra everyone.
** You can saute green chillies and onions in oil and add the prepared vermicelli with salt for a savory version.


Tuesday, September 27, 2011

Shrimp/ Prawn Masala

When I was a kid I liked chicken but was not much into seafood. Except certain Indian fishes like Mackerel (Bhangda) and Pomfret in fried form, I was not interested in fish. However I loved prawns. My mom had no complaints about me finishing off my plate, the day she made it. I enjoy a wide variety of seafood now but my love for shrimps and prawns, is still the same. I think it has a taste that not many who eat it can hate. 

I prepare a very simple, quick dish with shrimps these days. It is just peeled, deveined shrimp tossed together with Indian spices. Simple to make but the taste is elaborate. With my husband being a vegetarian, I can have this dish without sharing :-)


Ingredients:

  • 2 cups shrimp (peeled and deveined)
  • 1 large onion chopped
  • 1 large tomato chopped
  • 1 tsp mustard seeds
  • 1/2 tsp red chili powder
  • 1/2 tsp turmeric powder
  • 1 tsp coriander powder
  • 1/2 tsp cumin powder
  • 1/2 tsp garam masala
  • 3 tsp oil
  • Salt to taste

Directions:

  • In a deep pan, take oil and heat it. Add mustard seeds and when they splutter, add onions and saute.
  • When onions are browned, add tomatoes and cook.
  • Add chili powder, turmeric powder, coriander powder and cumin powder. Mix well.
  • Add the shrimps or prawns, whatever you have in hand. 
  • Add salt and garam masala and mix well.
  • Cover and cook the shrimps with the spices on low heat.
  • When the shrimps are done, remove from heat and serve warm with rotis or rice.
  • Enjoy


* You can garnish it with cilantro, as it will make a better presentation with some green color in the dish.


Thursday, September 15, 2011

Stuffed Broccoli Paratha

I love stuffed parathas and I will never be bored of having a paratha, in fact I bet there would be no desi, who does not like stuffed parathas. Broccoli is not an Indian dish vegetable but with all the good nutrients and health benefits, we Indians would be happy to borrow it into our meals. I went one step ahead and instead of making the western version of steamed, stir-fries and soups, made a stuffed paratha out of it. I hope broccoli was happy with it's new Indian avatar. I have no idea whether broccoli was happy but my husband and I, we were definitely two happy souls after having it.

Broccoli is definitely the healthiest of all the veggies in the market. In States, it is also easily available throughout the year. So there is no excuse for not including it in your meal. Broccoli has many health benefits, it is high in calcium, fibre, vitamin C (helping iron absorption), folic acid (good for women) and potassium (useful for hypertension). Furthermore it has sulforaphane and  indol-3 carbinol, both are anti-cancer agents. Having cancer in the family makes us see this benefit more. Since his mom is going through lymphoma now, hubby has to have a good diet to ensure good health in future. Broccoli is also known to control aging signs in the body because of its benefits. Now that I am interested in, with me hitting thirty this year :(

While making these parathas I used a method which I came across in the blog, Veggie Foodist. It is a life saver, time saver for me. I thank Bharti for this unique method of making parathas, which is quicker and also gives you a paratha with uniform filling. I managed to make parathas the traditional way, but always struggled getting the filling evenly distributed. This method works like a charm in having your filling evenly distributed and also it is just a one fold and roll method. I am not going back to the traditional method and am able to enjoy more parathas now. I only changed the shape of my parathas so I got triangular parathas rather than football shaped ones.
If you roll the dough circular and fold, you will get football shaped parathas
If you roll your dough oblong then you will get triangular parathas
Frankly I do not mind the shape till the end result is yummy.

Ingredients:

For the dough:

  • 4 cups whole wheat flour
  • Salt to taste
  • 1 tablespoon oil
  • 1and 1/2 cup warm water 
For the stuffing:
  • 3-4 heads of broccoli
  • 1-2 green chillies
  • 1/2 inch piece ginger
  • 1/2 onion chopped fine
  • 1/2 tsp garam masala
  • 1/2 tsp dry mango powder (aamchur)
  • salt to taste
  • 2 tsp oil
Directions:

For the dough:
  • Mix salt and flour well. 
  • Add 1 cup water first and start mixing. Then carefully add more water only if needed, say 1/4 cup at a time till you feel that the mix has enough water to knead it into a dough. If you add more water than needed and the dough is sticky add little flour and knead. Similarly if you feel the dough is dry add a tablespoons of water, to get it right.
  • Now add 1 tbsp oil and knead it into smooth dough. If you have a food processor use it by all means. Keep aside for half an hour.
For the stuffing:
  • Cut broccoli florets into small pieces and blend it with green chillies and ginger, without water. A food processor does this job well but if you do not have it, like me, then you just have to spend some time in chopping everything up into small pieces and then blend it.
Blended broccoli, ginger and chili mixture
  • Add salt, garam masala and aamchur powder to the broccoli mixture.
  • In a deep nonstick pan, heat oil, saute onions till soft and add the broccoli mixture
  • Keep stirring occasionally. I think 3-5 minutes on heat is good enough for the moisture to escape from the mixture and cook it, as it will again get cooked when you are making parathas. Let it cool.
The final broccoli stuffing
Making parathas:
  • Divide the dough into plum sized balls, also divide the broccoli mixture into equal or a tad smaller balls.
  • Roll the dough longish like a naan, use flour to prevent sticking. Place the stuffing on one half of the rolled dough, not in the center like the traditional way, leaving space on the edges.
  • Now fold the unfilled half over the filled one and seal the edges with your finger.
  • Start rolling it till you get a flat paratha, applying even pressure all over, gently to retain filling
  • You will get triangular parathas, which you then place on a hot griddle and cook on both sides applying oil on each side and flip as needed, till you get nice brown spots on both sides.
  • Serve hot with yogurt and it is a complete meal, veggie, whole grain and protein.
  • Enjoy!


Wednesday, September 14, 2011

Rajgira Aloo Paratha (Amaranth flour and potato flat bread)

My husband fasts every Saturday, and though he won't admit why he started doing that, I know the reason. He says it is for health reasons. Well you don't need to do a ritual fast for that! He actually started doing it after his mom was diagnosed with lymphoma. It was early this year and I knew the news was tough on him. My mother-in -law is in Mumbai and we are residing here in US. While she was under the care of my sister-in-law, due to the distance we could not do much for her. I think that is why he started fasting, maybe it was his way of doing something for her. I personally am a non-believer of fasts because I just don't get it, you can have cumin seeds but not mustard seeds, and all such funny rules don't make me feel  close to God. Plus most of the fasting foods are unhealthy, except fruits.

The news of my mother-in law having cancer has changed our life too. We have decided to go back to India for good, because it gets difficult managing family issues from here. With all the visa hassles and work pressure, you also can't travel anytime and stay for long, when needed. I loved my stay here in US and kind of feel bad to go back. It is an amazing country. I love its values of independence, I like american sense of humor and its 'work hard party hard' attitude. Not to forget I also picked up cake decorating skills here and would be open to make it a career option in future. I came here as a girl, at twenty-three with my husband, not knowing much about cooking. I explored cuisines from all over the world in my little kitchen here and what would be a better place than US, which is a melting pot of cultures from all over the world, to blend flavors. I have seen, and learnt a lot from, my mother and mother-in -law cooking, but I found my own style of cooking here, and fell in love with cooking. My daughter, too, was born here. So overall I have lot of good memories in this country. However I came here on H4 visa and that has always been a bone of contention during my stay here. So a part of me is also looking forward to go back. I am happy to know I will be going back a woman enriched with experience and skills. I was born and raised an Indian but US will always have a special place in my heart. Well for now we are just praying for my mother-in-law's health and for strength, while going through all the changes in our lives, we know it's not going to be easy.

Well, since my husband is fasting I still want him to eat healthy during that time. Having someone go through cancer in your family reminds you all the more, to eat healthy. Amaranth flour is very nutritious. It is high in iron, is fiber rich, has calcium and protein too. Amaranth is also gluten free. If you mix amaranth flour and whole wheat flour in equal proportions and make roti out of it, it will be healthier than your regular roti. To make rotis out of amaranth flour it is better to have some kind of binder since it is a gluten free flour. Since whole wheat is not allowed as per those fasting rules, I make these Amaranth parathas with potatoes and not only is it healthy, but tasty too.


Ingredients:
  • 1 cup amaranth flour (Rajgira atta)
  • 2 medium potatoes, cooked and mashed
  • 2 green chillies, minced
  • a handful cilantro chopped
  • salt to taste
Directions:
  • Mix everything together and knead into dough, without water. If you think you need water add 1 teaspoon  at a time, the potatoes give the needed moisture and binding to form the dough.
  • Divide it into equal parts to make 2"-2-1/2" diameter balls. 
  • Roll each ball to make a flat tortilla shaped roti. Roll it very gently flouring it well. If you put too much pressure or try to roll it too thin, it will get very sticky. You will get a 5"- 6" paratha after rolling.
  • Cook it on a hot griddle on each side, applying little oil on both sides, till brown spots appear.
  • Serve hot with yogurt or vegetable or gravy of your choice.
  • Enjoy

Thursday, September 1, 2011

Idli Masala

This is a great way of having leftover idlis. All the additional spices and flavor from onion and tomatoes give a zing to the old idlis.  I had tried oats idli from mix to match blogspot by Anudivya. It was great, plus I was happy with including fiber in the meal. I always end up making anything more than we can attempt to finish. We had oat idlis and sambhar for dinner and next day for breakfast turned them into these yummy idli masala.


Ingredients:
  • Leftover idlis chopped into 1" cubes, around 2 cups
  • 1 large onion chopped
  • 1 large tomato chopped
  • 1 tsp red chili powder 
  • 1/2 tsp turmeric powder
  • 1 tsp garam masala
  • 1 tsp mustard seeds
  • 1/4 tsp asafoetida
  • 5-6 curry leaves
  • 2-3 tsp oil
  • salt to taste
  • chopped cilantro for garnish
Directions:
  • In a deep non-stick pan, heat oil. Add mustard seeds, when they crackle add asafoetida and curry leaves.
  • Add onions and when they are soft, add tomatoes and let it cook till mushy.
  • Add chili powder, turmeric powder, garam masala and salt to taste. Mix well.
  • Add the chopped idlis, mix well and let it stay on low heat for around 5 minutes, covered.
  • Garnish with chopped cilantro and serve hot.

Thursday, July 21, 2011

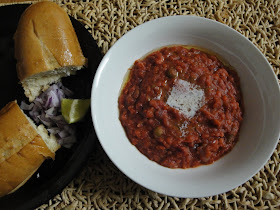
Pau Bhaji (Veggies with bread roll)

I think it is very apt that the post for vada pau is being followed bu pau bhaji. Pau bhaji is also an inseparable part of the Mumbai food culture. It originated during the days when mills were flourishing in Mumbai. It offered the mill workers a light but filling lunch so that they can get back to work actively. Gone are the mill days but the pau bhaji remains and is loved by all, rich and poor, foodies and health-freaks, and young and old. 

When you have pau bhaji outside it is definitely laden with butter. At home you can go light with the butter and you have a healthy and nutritious quick meal.

I will give you the recipe for bhaji - the thick vegetable gravy, which is to be enjoyed with the Bombay pau but you can use any bread roll that is available to you. The hamburger roll, hot dog rolls or specialty rolls like the sub or grinder roll, etc from bakery. You can also use whole wheat buns to make the meal more healthy.


Ingredients:
  • 4 potatoes peeled and chopped roughly
  • 3 carrots chopped
  • 1/2 cup green peas
  • 1 cup cauliflower florets
  • 12-15 green beans, stringed and chopped
  • 1/4 of a beetroot (this gives nice color to the gravy)
  • 1 large onion chopped fine
  • 1 bell pepper chopped fine
  • 2 large tomatoes chopped fine
  • 7-8 garlic minced
  • 1 green chili finely chopped (optional)
  • 3-4 tsp pau bhaji masala (it is hot so it is as per taste)
  • 1 tsp red chili powder
  • 1 tbsp butter
  • 3 tsp oil
  • 2 tsp lemon juice
  • salt to taste
For garnishing and serving-
  • Chopped onion
  • Chopped cilantro
  • Lemon wedge


Directions:
  • In a pressure cooker, cook potatoes, carrots, green peas, cauliflower, green beans and beet root, with little water. When they are done, remove the beetroot aside, let it cool and mash the veggies with a masher. Keep the mashed veggies aside. Puree the beetroot separately and keep.
  • In a deep non stick vessel take oil, heat it and add green chili if you are using it and garlic and onions. When the onions change color add bell pepper and cook well. Add tomatoes and let it cook well and become mushy.
  • Add pau bhaji masala, red chili powder, salt and mix well. Add the mashed vegetables and mix all together. Adjust salt, add lemon juice and butter and mix. Add little water if the gravy is too thick. Add the beetroot puree. You will get a lovely red color gravy. Let the gravy simmer for sometime and your bhaji is ready.
  • In a griddle take some butter and add split bread on it. When the bread is buttery and hot take it on a serving plate and serve it with bhaji and all the garnishing ingredients.
  • Enjoy
** Do not put too much beet root because it will make your gravy sweet, just 1/4 to 1/2 would be good depending upon the portion of your gravy.


Wednesday, July 20, 2011

Healthy Batata Vada (Potato fritters)

Vada Pau (potato fritter with bread) is my husband's favorite food item. He just resists to have it because they are deep fried potato fritters served with chutney in a bread roll. It is Mumbai's very popular, tasty street food. If you have lived in Mumbai you obviously know about vada paus. However if you have not tasted it and are planning to visit Mumbai, you should put it in your to do list in the city. A true Mumbaiite cannot imagine the city without it. Even if you are not in the city or planning to visit Mumbai, you can easily make it in your own kitchen. This dish is on the spicy side but you can adjust it as per your preference.

Well as I am sharing a healthier version of batata vadas I have omitted deep frying it and have made use of the sandwich maker to get yummy batata vadas without the grease. So you can have these guiltfree.


Tools Needed: Sandwich Maker


Ingredients:

For the potato mixture-
  • 4 large potatoes (cooked, peeled and mashed)
  • 1 tbsp cooking oil
  • 1-1/2 tsp mustard seeds
  • 3 tsp urad dal
  • 7-8 curry leaves
  • 3-4 green chillies finely chopped(as per preference)
  • 7-8 cloves garlic minced
  • 1/2 tsp turmeric powder
  • 1/4 tsp asafoetida
  • Salt to taste
  • 2 tsp lemon juice
For the coating batter-
  • 1 -1/2 cups chick pea flour/ besan
  • 1/2 tsp turmeric powder
  • 1/2 tsp red chili powder
  • 1/4 tsp baking soda
  • 1 tsp lemon juice
  • 2 tsp oil
  • salt to taste
  • water as per need
Directions:

For the potato mixture-
  • Take oil in a deep vessel and heat it.
  • Add mustard seeds, when they crackle add urad dal, asfoetida, curry leaves, green chillies and garlic. Fry them in oil really well taking care not to burn it.
  • Add mashed potatoes, turmeric powder, salt and lemon juice. Mix really well. Remove from heat.
  • Keep the mixture aside to cool. Then make small balls little bigger than golf balls from the potato mixture
For the coating batter-
  • Take chick pea flour in a small deep bowl.
  • Add salt, turmeric powder, red chili powder and mix well.
  • Add water slowly to make a thick pancake like batter that will coat the potato balls well
  • Take a tsp of lemon juice in a spoon and add baking soda on it. Add this fizzy mixture to the batter and mix well.
For the healthy vadas-
  • Traditionally the potato balls are coated with the chick pea four batter and deep fried in oil. However to make it healthy just flatten each ball of potato mixture in your palms and dip it in chickpea flour and put it in the groove of a sandwich maker. 
  • You can lightly coat the the inside of the sandwich maker with oil to make the vada a bit crispy.
  • Just use the sandwich maker as you normally make sandwiches in it. Let it heat and when the green light goes on put in the vadas and let the batter cook. You can make 4 vadas at a time. I sometimes let 2 heating cycles pass to make the vadas crispy. Depends on how much time you have in hand.
  • When done remove the vadas with a help of a wooden or nonstick spatula to protect the coating of your sandwich maker.
  • Serve it in pau/ bun with chutneys of your choice cilantro chutney, garlic chutney (which is an essential part of vada pau) or tamarind chutney or all three.
  • Enjoy it guilt free.
** If you have a panini press maybe you can try that too, to make healthy vadas. Let me know how they come out in it, if you try.


Monday, June 6, 2011

Oats Dosa

This dosa can really be called Oats Dosa because of the proportion of oats that goes into making it. The source for this recipe is "show me the curry". I have enjoyed watching lot of their recipes. They have very professional quality videos in spite of being homemade. This recipe makes amazing dosas and for all you oat lovers out there, this will be a new way to have your oats, if you are used to Indian cooking. Basically like any dosa this recipe calls for advance planning but when you have the batter ready it makes for a quick breakfast, lunch or dinner. Serve it with your choice of vegetable, sambhar or chutney. You can have a balanced meal in between a rushed day, if you can store the batter in refrigerator or freeze it. I got 2 meals for my family with the batter.

Friday dinner: Oats dosa with kanda bhaji (onion stir-fried in yogurt) & apple chutney

Sunday afternoon lunch: Oats dosa with potato masala stuffing and tomato chutney
Ingredients:
  • 3 cups oats (old fashioned or instant)
  • 2-1/2 cups water
  • 1 cup rice with 1 tsp fenugreek seeds
  • 1 cup urad dal
  • salt to taste
  • Water as per need
Directions:
  • Wash rice and urad dal lightly.
  • Soak them with 1 tsp fenugreek seeds in sufficient water so that they can double easily soaking water. Let rice and dal soak for about 6 hours.
  • Just one hour before you are ready to grind dal and rice, soak oats in 2-1/2 cups of water.
  • Drain water from rice and dal, and grind them to fine paste. Add water as needed to facilitate grinding. 
  • Now grind the oats into fine paste with the water it was soaked in.
  • Mix the two paste together and adjust consistency, it should be like dosa batter, should be able to spread on griddle.
  • Put this batter in a deep pot with cover and let it ferment for 8-10 hours in a warm place like lightly preheated oven or just leave it in oven with light on. 
  • Because of the presence of oats the batter will not double in size but will be bubbly and you can see that it has fermented. But still allow some room in the pot in which you will be fermenting your batter.
  • Add salt as per taste to the fermented batter.
  • Heat a flat griddle and pour a ladle full of batter and spread it with the ladle in circular motion making a thin crepe.
  • Let it get crispy and brown below and when the edges start coming off griddle on their own, you can flip it and cook on the other side.
  • Serve hot with chutney, sambhar or potato masala or all :)
* For a quicker version I have used 1 cup rice flour and 1 cup urad flour as a substitute for the grains. Jut add water as needed and grind it with oats. Then keep it for fermentation  and enjoy dosas.


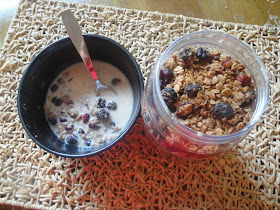
Homemade Granola

This is a simple recipe, just have to mix up things and let oven do the rest of the job for you. I found this recipe while going through cake designs on the blog "I am mommy/ i am baker". It was like you get the best things when you are not looking for it. It is healthy, homemade so you know what goes into it, inexpensive and versatile- eat it with milk for breakfast, have it as a topping on yogurt/ frozen yogurt or ice-cream or just have it as it is for a quick healthy snack. I do not like most of the cereals because they get mushy in milk and I hate that texture in mouth. I love this granola with milk for breakfast or snack.


Ingredients:
  • 2 cups old fashioned oats
  • 2 cups quick cook oats
  • 2-4 tsp cinnamon powder
  • 1 tsp clove powder
  • 1 cup raisins
  • 1 cup dried fruit of your choice (dried cranberries, blueberries, etc)
  • 2 tsp vanilla
  • 1/2 cup pure maple syrup
  • 1/2 cup canola / vegetable oil
Directions:
  • Preheat oven to 250 degree F.
  • Mix all the ingredients and spread them out on a baking sheet.
  • Bake for about an hour. After 30 minutes just sift it so that it gets baked evenly.
  • Cool for an hour before transferring into an airtight container.
* I have tried it with maple syrup and honey too. So if you don't have maple syrup available around you honey works.
* I just had old fashioned oats so I just used 4 cups of it and still works great.


Friday, June 3, 2011

Meen Kalumbu (Fish Curry)

As I have mentioned in my posts before, I grew up eating mangalorean food and I love chicken curry with rice chips (kori rotti), dry chicken (kori sukka), fish fry (kaidina meen), all mangalorean delicacies. I will post recipes for each one when I get to them. Today I am posting a recipe for meen kalumbu, which is not authentic mangalorean but comes little close to it. I tried it once when I was craving fish and got hooked to it. I can say that it is the best fish curry rather the fish curry which I enjoy the most. I think its roots can be traced to Chettinad (Tamilnadu) cooking.


Ingredients:
  • 6-7 pieces tilapia/ salmon pieces
  • 2 big onions (one chopped fine)
  • 1 tomato chopped fine
  • 1/4 cup grated coconut
  • 1 tsp fennel seeds
  • 1 tsp methi/ fenugreek seeds
  • 1 tsp red chili powder
  • 1 tsp turmeric powder
  • 2 tsp coriander powder
  • 1 green chilly chopped
  • 1 tbsp tamarind pulp
  • 4-5 tsp cooking oil
  • few curry leaves
  • salt to taste
Directions:
  • Grind together one onion, coconut and fennel seeds and keep aside
  • In a deep pot heat oil and add methi seeds, green chilly, curry leaves and chopped onion. Saute well.
  • When the onions lose its color add tomatoes and cook till mushy.
  • Add red chili powder, turmeric and coriander powder and mix well.
  • Add the ground paste and saute till raw smell of onion goes away.
  • Add salt and tamarind pulp, mix well and adjust the consistency of your curry.
  • Add the fish pieces.
  • Keep cooking with a closed lid on medium flame till the fish is cooked.
  • Garnish with cilantro (optional)
  • Enjoy the yummy fish curry with rice or rotis.

Thursday, May 26, 2011

Bajil (Mangalorean poha)

I have fond memories of Bajil, because it is not only a delicious snack but it reminds me of my mom fondly making it for us during tea-time. These days for tea-time is not even an elaborate affair for me. Tea-time is equal to stuffing into mouth anything edible I have in the pantry, while  struggling with my daughter to finish off her milk and cooking dinner. With husband commuting to New York city for work, we get to have relaxed breakfast or tea only during weekends.


Coming back to bajil, it is a quintessential Mangalorean snack. I grew up in Mumbai but my parents being from Mangalore, I grew up on authentic Mangalorean food. So any Mangalorean food draws the strings of my heart as well as tummy. Bajil is made from thin poha (beaten rice flakes) and the flavors used in it, give it a spicy, sweet and tangy taste.... a combination for success of any dish. It is a median between poha and chivda because it is chewy, neither very soft nor crispy. Why don't I start with the recipe, so that if you get a chance to try it, you can feel it for yourself.


Ingredients:

  • 2 cups thin poha
  • 3-4 dried red chillies
  • 1 tbsp coriander and cumin seeds crushed in a blender/ food processor
  • 1 tsp mustard seeds
  • 2 tsp urad dal
  • 2 tbsp peanuts
  • 1 tsp chana dal
  • 7-8 curry leaves
  • 1 onion finely chopped
  • 1 tsp turmeric powder
  • 1/2 cup fresh/ frozen shredded coconut
  • 1 tbsp jaggery (this is as per taste)
  • 1/2 tbsp oil
Directions:
  • In a deep pan, take oil and heat it. Add mustard seeds and when they splutter, add urad dal, chana dal and peanuts. Add red chillies and curry leaves. When the dals start changing color and the peanuts are fried well, add chopped onion.
  • When onions become soft, add jaggery and let it melt, mixing well.
  • Add poha, crushed cumin and coriander seeds, turmeric powder and shredded coconut. Mix well.
  • The poha will absorb the moisture from coconut and onions, and your bajil is ready.
  • You can add around 3/4 cup of soaked and cooked garbanzo beans or black grams to bajil and make it more nutritious. This is called as kadle bajil in mangalore.


Thursday, May 5, 2011

Savory Whole Wheat Cookies

I wanted to make something for my 2 and half year old to nibble on. She has a preference for savory hard snacks. She likes all those fried Indian snacks like sev, chakli, etc. It is quick to whip up something fried but I wanted her to have some nutrition as well, while snacking. I found a recipe for yogurt almond flat bread cookies on the blog "mix to match" by Anudivya and modified it to suit my family's taste. The hint of carom and cumin seeds that I added takes it to another level and gives it a farsi puri, which is a fried gujarati snack, kind of taste. Maybe that is the reason why my daughter likes it as she is half gujarati from her dad's side:)

These cookies have almonds, yogurt and whole wheat, and very little fat, so it is a tasty guilt free snack.


Ingredients:

  • 1/2 cup whole wheat flour 
  • 1/2 cup whole wheat pastry flour
  • 1/3 cup almond meal
  • 1/3 cup plain yogurt (low fat is good)
  • 2 tbsp unsalted butter 
  • 1/2 tsp salt 
  • 1/2 tsp baking soda 
  • 1 tsp cumin seeds
  • 1 tsp carom seeds
  • 1/2 tsp crushed black pepper
Directions:
  • Preheat oven to 350 degree F
  • Let butter come to room temperature and mix this softened butter with yogurt. Keep aside.
  • In a large bowl sift together whole wheat flour, whole wheat pastry flour, salt, baking soda, cumin seeds, carom seeds and crushed black pepper.
  • Add yogurt mixture and almond meal and knead into a dough. Keep aside for 10 minutes.
  • Roll the dough into 1/4 inch thickness and cut into desired shape.
  • Bake in the oven for 15 minutes.
  • Cool the cookies and they will firm up. If you like your cookies crisp and feel they are not crisp enough, you can put it in the oven again for 10 minutes at 260 degree F after they have cooled.
  • Enjoy


Friday, April 29, 2011

Raspberry Swirl Cheesecake

Yumm! Cheesecakes are my favorite desserts. If I were skinny I would have one each day. But when I am having a cheesecake, the melting creamy moment in the mouth is totally worth having those extra pounds and I do feel a lot lighter in my head. I tried out raspberry swirl cheesecake and it did come out amazing. I will share with you the regular as well as an eggless cheesecake recipe. The reason being we have friends who are vegetarians and do not eat eggs, and we also have sinner friends like me, who eat eggs. But they all love cheesecakes and I love sharing mine with them... well sometimes;)

The base is a classic NY style cheesecake and this cheesecake can be modified as per your preference to any flavors. You can add any puree as toppings, swirl or just top with fresh fruits and whipped cream. It always comes out to please. I made the regular cheesecake filling using Chantal's NY Cheesecake recipe, which is simple and quick to put together.


Regular Raspberry Swirl Cheesecake

Ingredients:
Crust

  • 1-1/2 cups crushed graham crackers
  • 4 tbsp melted butter
Raspberry Sauce
  • 6 oz raspberries
  • 2-3 tbsp sugar
  • 1 tsp cornstarch
Filling
  • 4 (8 ounce) packs cream cheese
  • 1-1/2 cups sugar
  • 3/4 cup milk
  • 1 cup sour cream
  • 1 tbsp vanilla extract
  • 1 tbsp lemon juice
  • 4 eggs, at room temperature
  • 1/4 cup all purpose flour

Directions:
Crust

  • Preheat oven to 350 degree F
  • Crush the graham crackers, using a ziploc bag or a blender/ food processor, whatever you prefer.
  • Mix the crushed crackers with melted butter
  • Press the mixture to the bottom of a springform pan using a cup or bowl with flat bottom.
  • Bake for around 10 minutes.
  • Remove and let it cool
  • Reduce the oven temperature to 325 degree F
Raspberry Sauce
  • Puree raspberries, adding sugar and cornstarch in a blender
  • Pass the puree through a sieve to remove all seeds from it.
  • In a small saucepan, heat the puree for few minutes till lightly thickened.
  • Cool it
Filling
  • Cream together cream cheese and sugar using a mixer.
  • Add milk, flour, vanilla extract and lemon juice, and blend together.
  • Add eggs one at a time. Do not overbeat, just barely till it is well incorporated.
  • Add sour cream and just blend till the batter is smooth.
  • Grease the sides of the prepared pan with crust and pour half of the filling on the crust.
  • Pour half teaspoon of raspberry sauce in dots over the filling
  • Pour the remaining batter and again top with raspberry sauce 1/2 tsp dots. It batter will look like having red polka dots on it.
  • Take a knife or a skewer and run through the dots to create swirls. You will have a marbled effect on the top. 
  • Bake for around 1 hour 5-10 minutes (depends on your oven).
  • Turn off the oven and leave the door open for 2-3 hours without removing the cheesecake from it.
  • When fully cooled put it in the refrigerator and cool overnight or at least 6 hours.
  • Enjoy the cheesecake of your labor.

Eggless Raspberry Swirl Cheesecake
Crust
  • 1-1/2 cups crushed graham crackers
  • 4 tbsp melted butter
Raspberry Sauce
  • 6 oz raspberries
  • 2-3 tbsp sugar
  • 1 tsp cornstarch
Filling
  • 4 (8 ounce) packs cream cheese
  • 1/2 cup sweetened condensed milk
  • 3/4 cup sugar
  • 1/4 tsp baking soda
  • 2 tsp baking powder
  • 1 tbsp vanilla extract
  • 1 tbsp lemon juice
  • 1/4 cup cornstarch
  • 1 cup sour cream
Directions:
  • Follow the directions for the crust and raspberry sauce in the regular cheesecake recipe.
Filling:
  • Cream together cream cheese, sweetened condensed milk and sugar.
  • Add vanilla extract, lemon juice, cornstarch, baking soda, baking powder and mix together.
  • Add sour cream and blend well till batter is smooth
  • Bake in the prepared pan for 1 hour 15-20 minutes.
  • Turn off the oven and let the cheesecake cool in it with door open for 2-3 hours.
  • Chill the cooled cheesecake in the refrigerator overnight or for at least 6 hours.
  • Like I said, enjoy the cheesecake of your labor.

Tip:
  • I find that greasing the sides really well helps to prevent cracking in the cheesecake.
  • You can give a water bath to your cheesecakes for clean even topped, creamy cheesecakes. You will have to seal the bottom of the spring form pan with aluminium foil to do this.


Tuesday, April 5, 2011

Baked Falafel Wrap

Falafel is a worldwide known middle-eastern dish. I became aware about Falafel only when we moved to New Jersey that is closer to New York city.You have street vendors selling Falafel as lunch to the all the city working crowd and the tourists from all over the world. New York can truly be called the melting pot of all the cultures from the world. You have good restaurants from all ethnicities of the world in the city. It is fun being there and just sitting at a nice spot and watching all the hustle and bustle happening around you. And while you are relaxing and taking in the city, never forget to munch on a yummy falafel.

Falafel are basically deep fried balls of chickpeas/ garbanzo beans. I just made small patties instead of balls and baked it in the oven. Came out good and when I put it in a pita with the other good stuff, it just tasted like those falafels you get in the city.

Ingredients:
For  Falafel
  • 1 cup chickpeas/ garbanzo beans (soaked overnight, cooked and drained)
  • 1/2 cup semolina (not the flour)
  • 3-4 green chillies (depending upon taste)
  • 1/2 cup cilantro (wash and chop it)
  • 1/2 cup parsley (wash and chop it)
  • 4 cloves garlic
  • 2 tsp cumin powder
  • 2 tsp crushed coriander seeds
  • 1 tsp baking powder
  • 2 tbsp oil
  • salt to taste
For the Wrap:
  • Whole wheat pita bread or any pita, flat or pocket ones.
  • Shredded lettuce
  • Tomatoes chopped
  • Onions Chopped
  • Cucumbers chopped
  • Hummus (I used home made hummus will put recipe in separate post)
  • Hot Sauce ( I just thinned tomato ketchup with water and added some chili powder, until it tasted right)


Directions:
For Falafel
  • In a blender, put green chillies, parsley, cilantro, garlic, some cooked garbanzo beans and blend well.Remove from blender in to a bowl.
  • Now put the remaining garbanzo beans and blend. If you have few beans or pieces left that is alright. Just ensure that most of it is well mashed.
  • Transfer the mashed beans into the same bowl. Mix both the pastes well. Add semolina, cumin powder, crushed coriander seeds, salt and baking powder. Mix well. The mixture will become dough like. Knead it and form small golf sized balls and just flatten it and place on a greased baking sheet. Spray top with cooking oil spray.


  • Put it in a preheated oven at 400 degree F and bake for around 20-30 minutes. Just flip the patties halfway so that both sides get evenly browned.

For the Wrap
  • Lightly warm the pita bread on a griddle on both sides or in a oven.
  • Spread hummus on the pita bread and drizzle hot sauce.
  • Top with lettuce, tomatoes, onions and cucumber.
  • Now add as many falafels as you like or depending on the size of pita.
  • Add a dollop of hummus on top and drizzle with hot sauce.


  • Tightly roll the pita and wrap it with aluminium foil to make eating it easier.
  • Enjoy your yummy wrap.
The falafels can be enjoyed in a wrap like above or can be had as appetizers with hummus, tahini and hot sauce. For special occasions you can also deep fry the balls of falafel.