Monday, June 6, 2011

Oats Dosa

This dosa can really be called Oats Dosa because of the proportion of oats that goes into making it. The source for this recipe is "show me the curry". I have enjoyed watching lot of their recipes. They have very professional quality videos in spite of being homemade. This recipe makes amazing dosas and for all you oat lovers out there, this will be a new way to have your oats, if you are used to Indian cooking. Basically like any dosa this recipe calls for advance planning but when you have the batter ready it makes for a quick breakfast, lunch or dinner. Serve it with your choice of vegetable, sambhar or chutney. You can have a balanced meal in between a rushed day, if you can store the batter in refrigerator or freeze it. I got 2 meals for my family with the batter.

Friday dinner: Oats dosa with kanda bhaji (onion stir-fried in yogurt) & apple chutney

Sunday afternoon lunch: Oats dosa with potato masala stuffing and tomato chutney
Ingredients:
  • 3 cups oats (old fashioned or instant)
  • 2-1/2 cups water
  • 1 cup rice with 1 tsp fenugreek seeds
  • 1 cup urad dal
  • salt to taste
  • Water as per need
Directions:
  • Wash rice and urad dal lightly.
  • Soak them with 1 tsp fenugreek seeds in sufficient water so that they can double easily soaking water. Let rice and dal soak for about 6 hours.
  • Just one hour before you are ready to grind dal and rice, soak oats in 2-1/2 cups of water.
  • Drain water from rice and dal, and grind them to fine paste. Add water as needed to facilitate grinding. 
  • Now grind the oats into fine paste with the water it was soaked in.
  • Mix the two paste together and adjust consistency, it should be like dosa batter, should be able to spread on griddle.
  • Put this batter in a deep pot with cover and let it ferment for 8-10 hours in a warm place like lightly preheated oven or just leave it in oven with light on. 
  • Because of the presence of oats the batter will not double in size but will be bubbly and you can see that it has fermented. But still allow some room in the pot in which you will be fermenting your batter.
  • Add salt as per taste to the fermented batter.
  • Heat a flat griddle and pour a ladle full of batter and spread it with the ladle in circular motion making a thin crepe.
  • Let it get crispy and brown below and when the edges start coming off griddle on their own, you can flip it and cook on the other side.
  • Serve hot with chutney, sambhar or potato masala or all :)
* For a quicker version I have used 1 cup rice flour and 1 cup urad flour as a substitute for the grains. Jut add water as needed and grind it with oats. Then keep it for fermentation  and enjoy dosas.


Homemade Granola

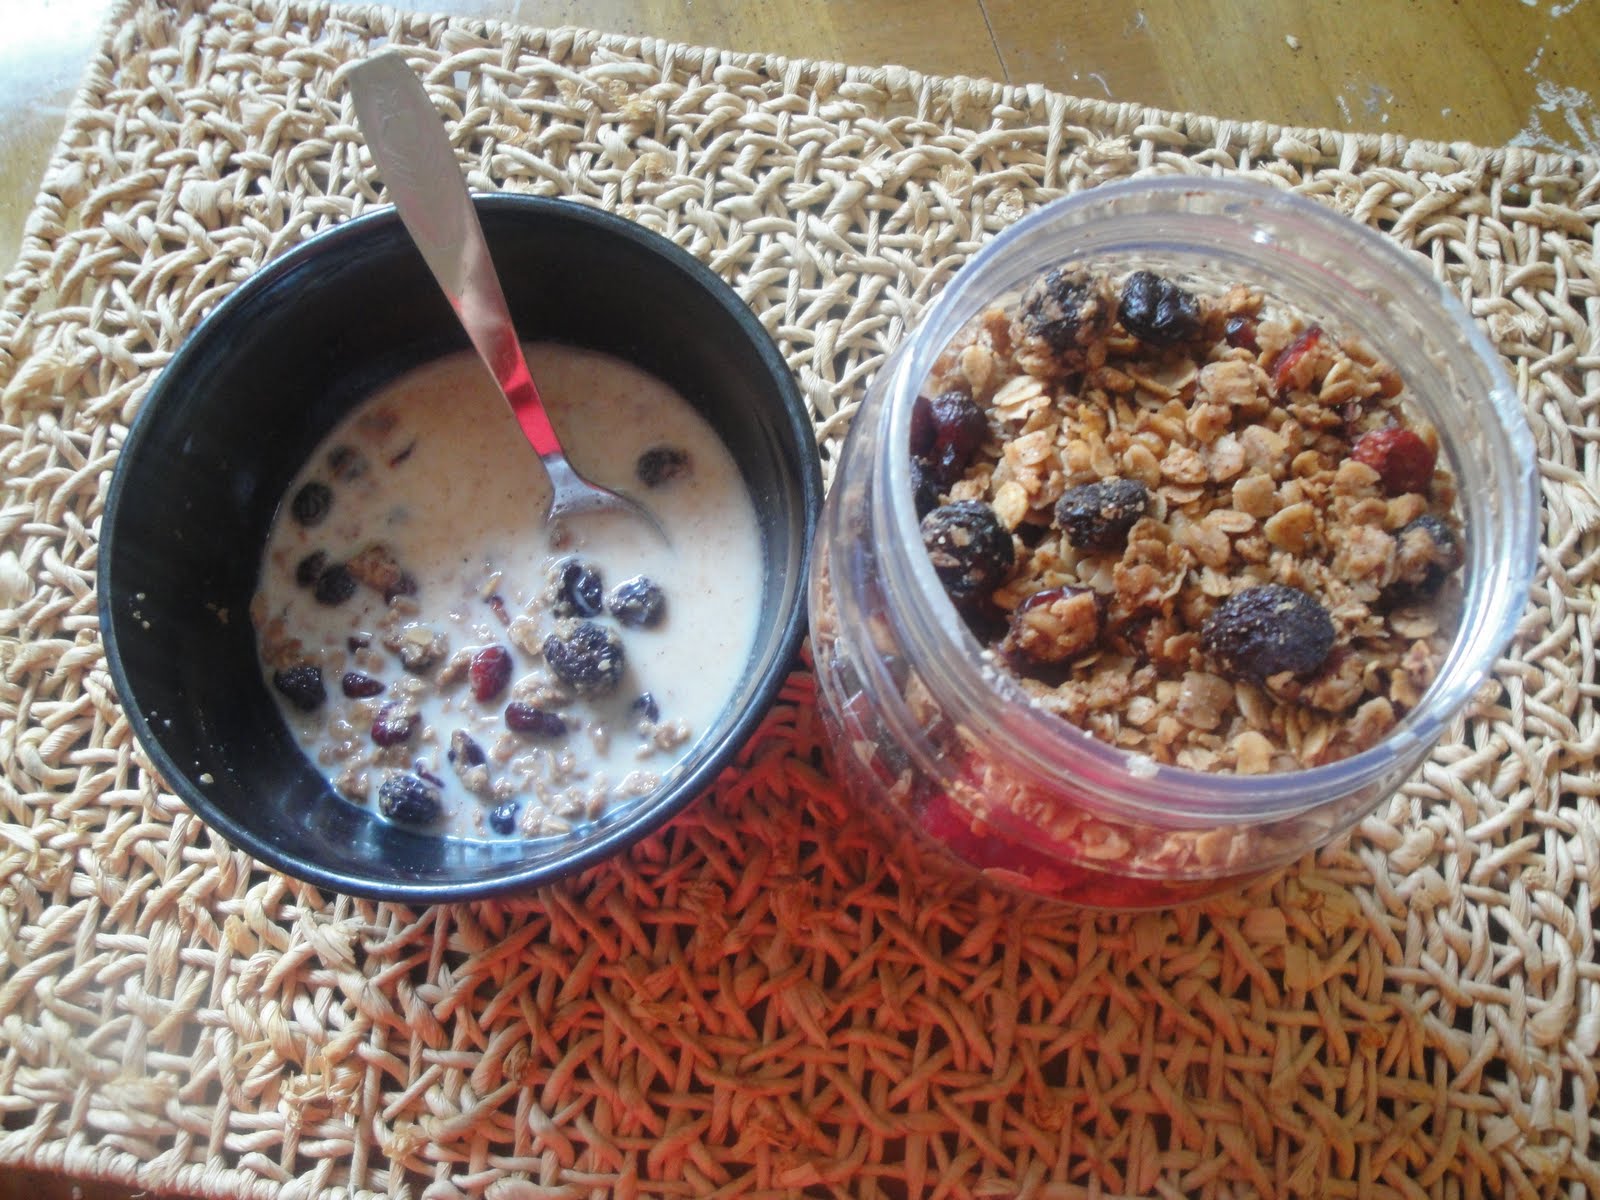
This is a simple recipe, just have to mix up things and let oven do the rest of the job for you. I found this recipe while going through cake designs on the blog "I am mommy/ i am baker". It was like you get the best things when you are not looking for it. It is healthy, homemade so you know what goes into it, inexpensive and versatile- eat it with milk for breakfast, have it as a topping on yogurt/ frozen yogurt or ice-cream or just have it as it is for a quick healthy snack. I do not like most of the cereals because they get mushy in milk and I hate that texture in mouth. I love this granola with milk for breakfast or snack.


Ingredients:
  • 2 cups old fashioned oats
  • 2 cups quick cook oats
  • 2-4 tsp cinnamon powder
  • 1 tsp clove powder
  • 1 cup raisins
  • 1 cup dried fruit of your choice (dried cranberries, blueberries, etc)
  • 2 tsp vanilla
  • 1/2 cup pure maple syrup
  • 1/2 cup canola / vegetable oil
Directions:
  • Preheat oven to 250 degree F.
  • Mix all the ingredients and spread them out on a baking sheet.
  • Bake for about an hour. After 30 minutes just sift it so that it gets baked evenly.
  • Cool for an hour before transferring into an airtight container.
* I have tried it with maple syrup and honey too. So if you don't have maple syrup available around you honey works.
* I just had old fashioned oats so I just used 4 cups of it and still works great.


Friday, June 3, 2011

Meen Kalumbu (Fish Curry)

As I have mentioned in my posts before, I grew up eating mangalorean food and I love chicken curry with rice chips (kori rotti), dry chicken (kori sukka), fish fry (kaidina meen), all mangalorean delicacies. I will post recipes for each one when I get to them. Today I am posting a recipe for meen kalumbu, which is not authentic mangalorean but comes little close to it. I tried it once when I was craving fish and got hooked to it. I can say that it is the best fish curry rather the fish curry which I enjoy the most. I think its roots can be traced to Chettinad (Tamilnadu) cooking.


Ingredients:
  • 6-7 pieces tilapia/ salmon pieces
  • 2 big onions (one chopped fine)
  • 1 tomato chopped fine
  • 1/4 cup grated coconut
  • 1 tsp fennel seeds
  • 1 tsp methi/ fenugreek seeds
  • 1 tsp red chili powder
  • 1 tsp turmeric powder
  • 2 tsp coriander powder
  • 1 green chilly chopped
  • 1 tbsp tamarind pulp
  • 4-5 tsp cooking oil
  • few curry leaves
  • salt to taste
Directions:
  • Grind together one onion, coconut and fennel seeds and keep aside
  • In a deep pot heat oil and add methi seeds, green chilly, curry leaves and chopped onion. Saute well.
  • When the onions lose its color add tomatoes and cook till mushy.
  • Add red chili powder, turmeric and coriander powder and mix well.
  • Add the ground paste and saute till raw smell of onion goes away.
  • Add salt and tamarind pulp, mix well and adjust the consistency of your curry.
  • Add the fish pieces.
  • Keep cooking with a closed lid on medium flame till the fish is cooked.
  • Garnish with cilantro (optional)
  • Enjoy the yummy fish curry with rice or rotis.

Thursday, May 26, 2011

Bajil (Mangalorean poha)

I have fond memories of Bajil, because it is not only a delicious snack but it reminds me of my mom fondly making it for us during tea-time. These days for tea-time is not even an elaborate affair for me. Tea-time is equal to stuffing into mouth anything edible I have in the pantry, while  struggling with my daughter to finish off her milk and cooking dinner. With husband commuting to New York city for work, we get to have relaxed breakfast or tea only during weekends.


Coming back to bajil, it is a quintessential Mangalorean snack. I grew up in Mumbai but my parents being from Mangalore, I grew up on authentic Mangalorean food. So any Mangalorean food draws the strings of my heart as well as tummy. Bajil is made from thin poha (beaten rice flakes) and the flavors used in it, give it a spicy, sweet and tangy taste.... a combination for success of any dish. It is a median between poha and chivda because it is chewy, neither very soft nor crispy. Why don't I start with the recipe, so that if you get a chance to try it, you can feel it for yourself.


Ingredients:

  • 2 cups thin poha
  • 3-4 dried red chillies
  • 1 tbsp coriander and cumin seeds crushed in a blender/ food processor
  • 1 tsp mustard seeds
  • 2 tsp urad dal
  • 2 tbsp peanuts
  • 1 tsp chana dal
  • 7-8 curry leaves
  • 1 onion finely chopped
  • 1 tsp turmeric powder
  • 1/2 cup fresh/ frozen shredded coconut
  • 1 tbsp jaggery (this is as per taste)
  • 1/2 tbsp oil
Directions:
  • In a deep pan, take oil and heat it. Add mustard seeds and when they splutter, add urad dal, chana dal and peanuts. Add red chillies and curry leaves. When the dals start changing color and the peanuts are fried well, add chopped onion.
  • When onions become soft, add jaggery and let it melt, mixing well.
  • Add poha, crushed cumin and coriander seeds, turmeric powder and shredded coconut. Mix well.
  • The poha will absorb the moisture from coconut and onions, and your bajil is ready.
  • You can add around 3/4 cup of soaked and cooked garbanzo beans or black grams to bajil and make it more nutritious. This is called as kadle bajil in mangalore.


Thursday, May 5, 2011

Savory Whole Wheat Cookies

I wanted to make something for my 2 and half year old to nibble on. She has a preference for savory hard snacks. She likes all those fried Indian snacks like sev, chakli, etc. It is quick to whip up something fried but I wanted her to have some nutrition as well, while snacking. I found a recipe for yogurt almond flat bread cookies on the blog "mix to match" by Anudivya and modified it to suit my family's taste. The hint of carom and cumin seeds that I added takes it to another level and gives it a farsi puri, which is a fried gujarati snack, kind of taste. Maybe that is the reason why my daughter likes it as she is half gujarati from her dad's side:)

These cookies have almonds, yogurt and whole wheat, and very little fat, so it is a tasty guilt free snack.


Ingredients:

  • 1/2 cup whole wheat flour 
  • 1/2 cup whole wheat pastry flour
  • 1/3 cup almond meal
  • 1/3 cup plain yogurt (low fat is good)
  • 2 tbsp unsalted butter 
  • 1/2 tsp salt 
  • 1/2 tsp baking soda 
  • 1 tsp cumin seeds
  • 1 tsp carom seeds
  • 1/2 tsp crushed black pepper
Directions:
  • Preheat oven to 350 degree F
  • Let butter come to room temperature and mix this softened butter with yogurt. Keep aside.
  • In a large bowl sift together whole wheat flour, whole wheat pastry flour, salt, baking soda, cumin seeds, carom seeds and crushed black pepper.
  • Add yogurt mixture and almond meal and knead into a dough. Keep aside for 10 minutes.
  • Roll the dough into 1/4 inch thickness and cut into desired shape.
  • Bake in the oven for 15 minutes.
  • Cool the cookies and they will firm up. If you like your cookies crisp and feel they are not crisp enough, you can put it in the oven again for 10 minutes at 260 degree F after they have cooled.
  • Enjoy


Friday, April 29, 2011

Raspberry Swirl Cheesecake

Yumm! Cheesecakes are my favorite desserts. If I were skinny I would have one each day. But when I am having a cheesecake, the melting creamy moment in the mouth is totally worth having those extra pounds and I do feel a lot lighter in my head. I tried out raspberry swirl cheesecake and it did come out amazing. I will share with you the regular as well as an eggless cheesecake recipe. The reason being we have friends who are vegetarians and do not eat eggs, and we also have sinner friends like me, who eat eggs. But they all love cheesecakes and I love sharing mine with them... well sometimes;)

The base is a classic NY style cheesecake and this cheesecake can be modified as per your preference to any flavors. You can add any puree as toppings, swirl or just top with fresh fruits and whipped cream. It always comes out to please. I made the regular cheesecake filling using Chantal's NY Cheesecake recipe, which is simple and quick to put together.


Regular Raspberry Swirl Cheesecake

Ingredients:
Crust

  • 1-1/2 cups crushed graham crackers
  • 4 tbsp melted butter
Raspberry Sauce
  • 6 oz raspberries
  • 2-3 tbsp sugar
  • 1 tsp cornstarch
Filling
  • 4 (8 ounce) packs cream cheese
  • 1-1/2 cups sugar
  • 3/4 cup milk
  • 1 cup sour cream
  • 1 tbsp vanilla extract
  • 1 tbsp lemon juice
  • 4 eggs, at room temperature
  • 1/4 cup all purpose flour

Directions:
Crust

  • Preheat oven to 350 degree F
  • Crush the graham crackers, using a ziploc bag or a blender/ food processor, whatever you prefer.
  • Mix the crushed crackers with melted butter
  • Press the mixture to the bottom of a springform pan using a cup or bowl with flat bottom.
  • Bake for around 10 minutes.
  • Remove and let it cool
  • Reduce the oven temperature to 325 degree F
Raspberry Sauce
  • Puree raspberries, adding sugar and cornstarch in a blender
  • Pass the puree through a sieve to remove all seeds from it.
  • In a small saucepan, heat the puree for few minutes till lightly thickened.
  • Cool it
Filling
  • Cream together cream cheese and sugar using a mixer.
  • Add milk, flour, vanilla extract and lemon juice, and blend together.
  • Add eggs one at a time. Do not overbeat, just barely till it is well incorporated.
  • Add sour cream and just blend till the batter is smooth.
  • Grease the sides of the prepared pan with crust and pour half of the filling on the crust.
  • Pour half teaspoon of raspberry sauce in dots over the filling
  • Pour the remaining batter and again top with raspberry sauce 1/2 tsp dots. It batter will look like having red polka dots on it.
  • Take a knife or a skewer and run through the dots to create swirls. You will have a marbled effect on the top. 
  • Bake for around 1 hour 5-10 minutes (depends on your oven).
  • Turn off the oven and leave the door open for 2-3 hours without removing the cheesecake from it.
  • When fully cooled put it in the refrigerator and cool overnight or at least 6 hours.
  • Enjoy the cheesecake of your labor.

Eggless Raspberry Swirl Cheesecake
Crust
  • 1-1/2 cups crushed graham crackers
  • 4 tbsp melted butter
Raspberry Sauce
  • 6 oz raspberries
  • 2-3 tbsp sugar
  • 1 tsp cornstarch
Filling
  • 4 (8 ounce) packs cream cheese
  • 1/2 cup sweetened condensed milk
  • 3/4 cup sugar
  • 1/4 tsp baking soda
  • 2 tsp baking powder
  • 1 tbsp vanilla extract
  • 1 tbsp lemon juice
  • 1/4 cup cornstarch
  • 1 cup sour cream
Directions:
  • Follow the directions for the crust and raspberry sauce in the regular cheesecake recipe.
Filling:
  • Cream together cream cheese, sweetened condensed milk and sugar.
  • Add vanilla extract, lemon juice, cornstarch, baking soda, baking powder and mix together.
  • Add sour cream and blend well till batter is smooth
  • Bake in the prepared pan for 1 hour 15-20 minutes.
  • Turn off the oven and let the cheesecake cool in it with door open for 2-3 hours.
  • Chill the cooled cheesecake in the refrigerator overnight or for at least 6 hours.
  • Like I said, enjoy the cheesecake of your labor.

Tip:
  • I find that greasing the sides really well helps to prevent cracking in the cheesecake.
  • You can give a water bath to your cheesecakes for clean even topped, creamy cheesecakes. You will have to seal the bottom of the spring form pan with aluminium foil to do this.


Tuesday, April 5, 2011

Baked Falafel Wrap

Falafel is a worldwide known middle-eastern dish. I became aware about Falafel only when we moved to New Jersey that is closer to New York city.You have street vendors selling Falafel as lunch to the all the city working crowd and the tourists from all over the world. New York can truly be called the melting pot of all the cultures from the world. You have good restaurants from all ethnicities of the world in the city. It is fun being there and just sitting at a nice spot and watching all the hustle and bustle happening around you. And while you are relaxing and taking in the city, never forget to munch on a yummy falafel.

Falafel are basically deep fried balls of chickpeas/ garbanzo beans. I just made small patties instead of balls and baked it in the oven. Came out good and when I put it in a pita with the other good stuff, it just tasted like those falafels you get in the city.

Ingredients:
For  Falafel
  • 1 cup chickpeas/ garbanzo beans (soaked overnight, cooked and drained)
  • 1/2 cup semolina (not the flour)
  • 3-4 green chillies (depending upon taste)
  • 1/2 cup cilantro (wash and chop it)
  • 1/2 cup parsley (wash and chop it)
  • 4 cloves garlic
  • 2 tsp cumin powder
  • 2 tsp crushed coriander seeds
  • 1 tsp baking powder
  • 2 tbsp oil
  • salt to taste
For the Wrap:
  • Whole wheat pita bread or any pita, flat or pocket ones.
  • Shredded lettuce
  • Tomatoes chopped
  • Onions Chopped
  • Cucumbers chopped
  • Hummus (I used home made hummus will put recipe in separate post)
  • Hot Sauce ( I just thinned tomato ketchup with water and added some chili powder, until it tasted right)


Directions:
For Falafel
  • In a blender, put green chillies, parsley, cilantro, garlic, some cooked garbanzo beans and blend well.Remove from blender in to a bowl.
  • Now put the remaining garbanzo beans and blend. If you have few beans or pieces left that is alright. Just ensure that most of it is well mashed.
  • Transfer the mashed beans into the same bowl. Mix both the pastes well. Add semolina, cumin powder, crushed coriander seeds, salt and baking powder. Mix well. The mixture will become dough like. Knead it and form small golf sized balls and just flatten it and place on a greased baking sheet. Spray top with cooking oil spray.


  • Put it in a preheated oven at 400 degree F and bake for around 20-30 minutes. Just flip the patties halfway so that both sides get evenly browned.

For the Wrap
  • Lightly warm the pita bread on a griddle on both sides or in a oven.
  • Spread hummus on the pita bread and drizzle hot sauce.
  • Top with lettuce, tomatoes, onions and cucumber.
  • Now add as many falafels as you like or depending on the size of pita.
  • Add a dollop of hummus on top and drizzle with hot sauce.


  • Tightly roll the pita and wrap it with aluminium foil to make eating it easier.
  • Enjoy your yummy wrap.
The falafels can be enjoyed in a wrap like above or can be had as appetizers with hummus, tahini and hot sauce. For special occasions you can also deep fry the balls of falafel.


Monday, April 4, 2011

Vegetable Frankie with Egg Wrap

Frankie is a fast food that people in Mumbai must be familiar with. It is yummy and very filling. I remember my college days when I had it outside my college with friends from the stalls set up by street food vendors. Street food has it's own charm in Mumbai just like all the falafel and hot dog stalls in New York city. Mumbai is known for its fast food stalls.  With it's wide array of fast food ranging from vada pau, all chaats, sandwich, frankies, pav bhaji to dosa stalls you have streets famous for the food it has to offer.

Frankie is basically a tortilla wrapped with savory filling. Fillings can range from potatoes, paneer to keema, chicken, etc.


Ingredients:

  • 6 whole wheat tortillas
  • 3 eggs
  • 4 potatoes cooked and mashed
  • 1 green bell pepper chopped
  • 1/2 cup cooked green peas
  • 1/2 cup grated paneer/ cheese (optional)
  • 1 onion chopped
  • 1/2 cup cilantro leaves chopped
  • 1 tsp red chilli powder (you can adjust this as per taste)
  • 1/2 tsp amchur/ dry mango powder
  • 1 tsp chat masala
  • 1 tsp cumin powder
  • 1 tbsp lime juice
  • 2 tbsp cooking oil
  • salt to taste
Directions:
  • In a deep pan heat oil. Add chopped bell pepper. Saute well.
  • Add red chili powder, amchur powder, chat masala, cumin powder and mix well. 
  • Add potatoes, paneer/ cheese, green peas, chopped onion, cilantro, lime juice and salt to taste. Remove from heat and mix everything well. You can add any other filling like scrambled eggs, cooked minced chicken, etc. Get creative with the filling.
  • Keep this filling aside.
  • Heat tortilla on a griddle, on both sides. Add beaten eggs, 1-2 tablespoon on one side of the tortilla. Spread it all over and flip it. Let the eggs get cooked. Then flip and let brown spots appear on the other side.
  • Take this tortilla fill it with the prepared filling, roll it and serve with tomato ketchup.
  • Enjoy

Tip:
  • If you don't get ready tortillas then make large rotis out of whole wheat flour. Just knead it with milk and add little oil to help the kneading process. Roll out and make regular rotis, lightly cooking on both sides.

Friday, April 1, 2011

Methi Dhebra

Methi dhebra is a gujarati flavored roti. My husband is Gujarati and before I married him I was not aware of all snacks like handvo, thepla, muthiya and I knew about khaman dhokla but not about khatta dhokla. I love all these snacks plus I discovered something called as dhebra. It is not made at my in laws place but it is a gujarati dish which is full of flavor plus it is made of whole wheat flour and bajra/ millet flour so it is nutritious too. It has the added value of methi/ fenugreek leaves so it is actually a balanced food.

Usually it is had with pickle but one bite and I will tell you you will never have enough of it. You frankly do not need any accompaniments with it. You can keep devouring dhebra after dhebra without missing out on anything. 

I went through lot of recipes for making this delectable snack but show me the curry had the easiest or maybe the best presented version. So I used their recipe as a base and made just little modifications from my side.


Ingredients:

  • 1 cup whole wheat flour 
  • 1/3 cup millet flour/ bajra 
  • 1/2 cup yogurt 
  • 1 tbsp lime juice (if the yogurt is not sour)
  • 1 tbsp jaggery or brown sugar 
  • 2 tsp minced ginger
  • 2 tsp minced garlic 
  • 1 tbsp sesame seeds
  • 1 tsp cumin powder 
  • 1/2 tsp turmeric powder
  • 1/2 tsp red chili powder
  • minced green chillies to taste
  • 1 tsp salt or to taste
  • 1 cup fresh methi leaves  chopped or 3 tbsp kasoori methi (dried fenugreek leaves)
  • 1/4 cup cilantro chopped if you do not have fresh methi leaves
  • 2 tbsp oil
  • Oil for pan frying
Directions:
  • In a bowl take yogurt and add all the ingredients from lime juice to methi leaves or cilantro leaves. Mix all the ingredients well.
  • In a large mixing bowl whisk together whole wheat and bajra flour. Add 2 tbsp oil to the flour and mix well.
  • Add the yogurt mixture (if using jaggery just ensure that it has dissolved completely in it) to the flour and mix. Start kneading and knead it into a dough. You can use a tsp or 2 of oil to help you knead well. If you feel your dough is too soft add a tbsp of whole wheat flour at a time and too dry add a tsp of yogurt at a time and knead. The dough should be not too hard and not too soft, then it will be easier to roll it.
  • Let the dough rest for around 15-30 minutes.
  • Heat a griddle on stove top.
  • Divide the dough into lemon sized balls.
  • Start rolling one ball at time using a rolling pin and flat surface. Use whole wheat flour to dust the flattened balls from time to time when they get sticky while rolling. Roll it into flat rounds as thin as a tortilla.
  • Put the rolled dhebra on griddle and when light bubbles start appearing on top flip it on the griddle.
  • Put oil on the top surface of dhebra using spoon. Just dip the spoon in oil and run it over the surface.
  • Flip it once again and you will see brown spots on this surface. Run oiled spoon on this surface too.
  • When both sides are cooked well with some brown spots your dhebra is ready.
  • Put it in a metal or insulated container. 
  • Follow the same process with rest of the balls and stack dhebras in the container. Cover it only it has cooled off a bit or your dhebras will be moist with all the heat inside.
  • Serve warm or when ready to eat.
  • These rotis have long shelf life and are ideal for carrying along on your trips.


Thursday, March 31, 2011

Caesar salad (Chicken or veg)

There are days when you want to go light after feasting for days or you just want to lose those extra pounds. Well what is better than a light salad for such days. Salads have evolved a lot it no longer means few raw things thrown together. In fact if it is thoughtfully made it can be a balanced meal with proteins, vitamins and limited carbs. You can make your own healthy and yummy dressings and add a zing to it. Gone are the days when salads used to be boring.

I had tried this whole wheat bread but it came out dry and compact. But it turned out into great tasting croutons. I will share with you the recipe for my croutons too.

This salad can be made by vegetarians as well as chicken eaters.


Ingredients:

For the Croutons:
  • 4 cups bread cut into 1/2" cubes (you can use fresh or 2-3 day old bread)
  • 1/2 cup olive oil 
  • 3 cloves garlic minced 
  • Salt and pepper to taste
  • 1 tsp dried parsley, thyme (optional)
For the Dressing:
  • 2 tbsp lemon juice
  • 1 cup greek yogurt or regular yogurt (whey drained by hanging in muslin cloth for an hour)
  • 1 clove garlic
  • 2 tbsp tomato ketchup
For the Salad:
  • Around 8-9 cups Romaine lettuce sliced as needed or you can use the mixed bag of romaine lettuce, iceberg and red cabbage.
  • 1 cup sliced red bell pepper
  • 2 cups chicken grilled and chopped into cubes or 2 cups paneer or tofu roasted in oven or grilled.

Directions:

For the Croutons:
  • Preheat oven to 350 degree F.
  • Mix minced garlic with olive oil or blend olive oil with garlic.
  • In a large bowl mix together bread cubes, olive oil, salt, pepper and herbs
  • Ensure that bread cubes are evenly covered with oil to avoid dry or soggy pieces.
  • Bake at 350 degree F for around 15 minutes or until browned in a single layer on a greased cookie sheet.
  • Let it cool and store in an airtight container.

For the Dressing:
  • Blend together all the ingredients in a blender and keep aside.
For the Salad:
  • In a large bowl toss together lettuce, bell pepper and chicken/ paneer/ tofu (whatever you are using).
  • Add the dressing, mix well and add croutons and enjoy your light and healthy meal.


Wednesday, March 30, 2011

Mini Greek Pizza Muffins

These are savory muffins that have the subtle greek pizza taste. You can taste tomatoes, onion, garlic, olives and feta cheese, all those things which go into a greek pizza. These can be served as appetizers with marinara sauce while entertaining or you can also have them for breakfast or tea. It is not my own recipe I happened to see it on www.delish.com and it sounded wonderful and I made them and they taste wonderful too.


Ingredients:

  • 2 tbsp extra-virgin olive oil
  • 2/3 cup finely chopped onion
  • 2/3 cup finely chopped red bell pepper
  • 1/3 cup whole-wheat pastry flour
  • 1/3 cup all-purpose flour
  • 2 tsp baking powder
  • 1 1/2 tsp chopped fresh oregano, or 1/2 teaspoon dried
  • 1 tsp sugar
  • 1/4 tsp garlic powder or 3 garlic cloves minced
  • 1/4 tsp salt
  • 1/3 cup low-fat milk
  • 1/3 cup crumbled feta cheese
  • 1  large egg, well beaten
  • 2 tbsp tomato paste
  • 2 tbsp chopped kalamata olives
Directions:
  • Heat olive oil in a deep pan. If you are using fresh garlic then add it at this stage along with onion and red bell pepper. Keep stirring and cook for around 5 minutes till the onions are tender. Remove from heat and let it cool.
  • Preheat oven to 400 degree F and spray a mini muffin pan with cooking oil 
  • Whisk whole-wheat pastry flour, all-purpose flour, baking powder, oregano, sugar, garlic powder (if using it in powdered form) and salt in a medium bowl.
  • Stir milk, feta, egg, tomato paste and olives into the onion mixture. Make a well in the dry ingredients; add the wet ingredients and stir until just combined. Fill the prepared muffin cups two-thirds full.
  • Bake the muffins until lightly browned, 13 to 15 minutes. Cool in the pan for 5 minutes before turning out onto a wire rack. Serve warm or at room temperature.


Couscous Khichdi

I love the taste of Sabudana Khichdi which is a stir fried preparation for tapioca pearls. However it is said that it is not very healthy for you. I think it is the fact that it is loaded with starch and carbs and has little or almost no nutritional value. Sabudana by itself is bland but the preparation with chillies, cumin seeds and peanuts adds all the jazz to the dish and you get a yummy combination of flavors. I just wanted to have that taste but with health so thought about making it with couscous and it came out very close and now you also have nutritional value. You can use the regular couscous or whole wheat couscous.
Whole wheat regular couscous khichdi

Regular pearl couscous khichdi- this comes more close to sabudana khichdi


Ingredients:

  • 1 cup whole wheat couscous (or the regular one)
  • 1 medium potatoes cut into 1/2" cubes
  • 2-3 green chillies chopped as per taste
  • 7-8 currry leaves
  • 2 tsp cumin seeds
  • 1/2 cup peanuts (roasted and roughly ground)
  • 2 tbsp olive oil (or any other cooking oil)
  • 1 tbsp lime juice
  • few sprigs cilantro chopped fine
Directions:
  • Cook couscous as per package instructions. Usually it will ask you to cook a cup of couscous in a cup of boiling water, cover it and fluff it after 5-10 minutes. You will have couscous with separate grains just like sabudana.
  • Roast peanuts and grind it coarsely. 
  • Take oil in a deep pan and heat it on medium flame. Add cumin seeds and when they stop crackling add green chillies and curry leaves. Green chillies are as per personal preference because there are lot of varieties of green chillies with different heat level.
  • Add chopped potatoes, mix well and cook it on low flame with a cover on the pan.
  • Keep checking and mixing in between to ensure even cooking and so that the potatoes don't get burnt.
  • When the potatoes are cooked add ground peanuts, cooked couscous, salt to taste and lime juice.
  • Mix well and top it with chopped cilantro.
  • Serve warm and enjoy.


Friday, March 25, 2011

Mango Shrikhand (Amrakhand)

Mango Shrikhand is a yummy sweet from India which is often had along with the main course as an accompaniment with puris. It has a taste similar to that of cheesecake but in texture it is like mousse. Shrikhand is mainly made of sour cream cheese or yogurt. Either whey is drained off curdled milk or from yogurt and you add sugar and other flavors to get this sweet and sour delicacy.


Ingredients:

  • 5 cups plain yogurt
  • 1-1/2 cups mango pulp (I used sweetened store bought alphonso mango pulp)
  • 1/2 cup sugar (add more sugar as per taste)
  • 1/4 cup chopped nuts (pistachio, almonds)
  • 1 tsp cardamom powder
  • few strands saffron about a pinch
Directions:
  • Drain whey off yogurt using a cheesecloth for 7-8 hours or overnight is better.
  • Remove the yogurt and but it in a bowl. You will probably be left with about 2 cups of yogurt.
  • Put the yogurt in fridge for at least half an hour till you finish off preparing all other ingredients.
  • Add sugar to the yogurt and mix it well.
  • Take 2 tbsp mango pulp, warm it and rub saffron strands in it. Mix it with the yogurt
  • Mix mango pulp and cardamom powder
  • Add more sugar or mango pulp if needed but let the consistency of the shrikhand be creamy and not watery
  • Add chopped nut and save some to garnish on top.
  •  Chill in refrigerator for 2-3 hours before serving.
Other tips:
  • If you want plain shrikhand omit mango pulp and rest of the ingredients remain the same. Just rub saffron in 2-3 tbsp milk instead of mango pulp.
  • If you do not have time to wait overnight you can make instant plain shrikhand using 2 cups sour cream and add sugar as per taste and all other flavors. To make instant mango shrikhand you can use a mix of 1 cup sour cream, 1 pack cream cheese, and mango pulp and sugar as per taste.

Zucchini Bhaji/ Stir fried Zucchini

It was one of those days when I was feeling brain dead. Just couldn't think of what to make for lunch and I also get bored of the run of the mill daily dishes. So wanted to make something different with my numb state of mind. I started looking for recipes and also I was in no mood for an elaborate dish. I happened to find just the right one on about.com. The recipe is from Petrina Verma Sarkar. It is an Indian based dish using zucchini. So it is one of those quick dishes that you can squeeze in on a busy day or make it when you are in a state like me. It is quick but flavor wise very satisfying.


Ingredients:
  • 3 large zucchinis
  • 3-4 tbsp chickpea flour/ besan
  • 1 tsp red chili powder
  • 1/2 tsp turmeric powder
  • 1 tsp cumin powder
  • 1 tsp cumin seeds
  • 1 tsp carom seeds/ ajwain
  • 1 tbsp olive/ canola/ vegetable oil
  • Salt to taste
Directions:
  • Clean zucchini and cut it into 1" cubes
  • In a mixing bowl put zucchini pieces and add chickpea flour, red chili powder, turmeric powder and cumin powder. Mix well and keep aside.
  • In a deep nonstick pan, heat oil. I prefer nonstick cause you need less oil in it. If you are not using nonstick then just add 1 more tablespoon of oil. Add cumin seeds and ajwain seeds and when it starts spluttering add the zucchini mixture.
  • On low flame, cover the vessel and let the chick pea flour get cooked. When the flour starts turning golden and gives an aroma the bhaji is done because zucchini will also be cooked by then.
  • Serve warm with roti, rice and dal.


Methi Kela Subzi (Fenugreek Banana Fry)

Well I seem to be getting obsessed with banana recipes. I dont know these days we seem to be having lot of bananas getting brown before we got eating them. I hate wasting food. So there I try to create something out of those unappetizing looking but still good to eat bananas. I did post recipes for banana bread and banana cookies but you dont crave sweet alll the time and banana bread is a kind of bread which you either hate or love. That depends on how much you love the humble, versatile, quick to eat, yellow fruit.

This time I am posting an Indian entree, Fenugreek Banana Fry called as Methi Kela Bhaji in India. When you listen to the name it sounds like a wierd combination, a fruit and a vegetable togther. One bitter and other sweet but that is what creates magic together. The bitterness is masked by bananas and the extreme sweetness of those overripe bananas are subdued by fenugreek leaves.


Ingredients:
  • 1 large bunch fenugreek/methi leaves (picked, cleaned and chopped)
  • 3-4 ripe bananas (peeled and cut into large 1" slices)
  • 1 tsp mustard seeds
  • 1 green chili chopped
  • 1 inch finely chopped ginger
  • 1/4 tsp asafoetida
  • 1 tsp read chili powder
  • 1/2 tsp turmeric powder
  • 2 tsp coriander powder
  • 1 tsp cumin powder
  • salt to taste
  • 1 tbsp oil
Directions:
  • Take oil and heat it in a large nonstick vessel.
  • Add mustard seeds and when they splutter add green chillies and ginger.
  • Add asafoetida and red chili powder and immediately add the prepared methi leaves.
  • Mix well, add turmeric powder, coriander powder, cumin powder and salt.
  • Add thick slices of bananas and lightly mix well.
  • Do not stir too much after you add bananas, just cover the vessel and let the methi leaves get cooked on low flame.
  • In between just stir lightly to mix all spices and ensure even cooking.
  • This is a very quick cooking dish so it will not take very long. So once the methi leaves are cooked turn off the gas and you can serve it warm with roti, paratha or naan.


Friday, March 4, 2011

Spicy Corn Soup

This a soup which my soup hating husband loves. It is very yummy especially if you like spicy food, you will love that little heat with corn flavor. It has a creamy texture. I bet it can become your favorite soup too once you try it.


Ingredients:
  • 4 cups corn kernels (fresh or frozen)
  • 1 tbsp olive oil
  • 1 onion chopped
  • 4 cloves garlic finely chopped
  • 3/4 tsp red chili powder
  • salt as per taste
  • 6 cups water/ chicken stock/ veg stock
  • 1/3 cup heavy cream
Directions:
  • In a large vessel, take a tablespoon of olive oil and heat it.
  • Add onion and garlic and saute well for a minute or two.
  • Add red chili powder and corn kernels, mix well.
  • Add water or stock and cook the corn kernels well.
  • When the corn is cooked, take the vessel off the stove top and let it cool.
  • Blend the mixture in a food processor and pass the puree through a strainer or a sieve into a vessel. Discard the corn particles collected in the strainer.
  • Heat the puree add salt and heavy cream. Let it simmer for some time.
  • Enjoy it warm in this cold weather.
Adapted from A Foodnetwork Recipe